출처: http://www.ologist.co.kr/79

이 그림을 그려서 올려 주신분께
감사의 인사 올립니다. 꾸벅.. (__)
이 그림을 그려서 올려 주신분께
감사의 인사 올립니다. 꾸벅.. (__)
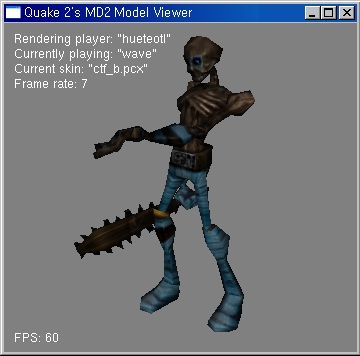
Quake II의 MD2 파일 포멧
written by David Henry
21st December 2002
소개
"에~ 새로운 MD2 투터리얼은 아직..." 그렇지만, 다른 방식으로 그것들을 어떻게 렌더링(그리다) 할지 보여 줄 것이다. ;)
그
렇지만 MD2가 도대체 뭐지? MD2 파일 포멧은 3D 모델 파일 포멧으로 Id 소프퉤어의 QuackeII 엔진에서 사용된
것이다! 그리고 여기 내가 당신에게 OpenGL을 사용해서 스크린에 어떻게 로드에서 뿌려 줄지 보여주겠다!
넌
아마도 "이런 줸장, 이 자식이 1997년 구닥다리에 연연하는거야" 라고 하겠지만, 그것을 사용하는데는 좋은 이유가 있다 ;)
첫 째, MD2 파일 포멧은 배우기에 좋은 초 간단 3D 모델 파일 포멧을 갖고 있다( 만일 당신이 초심자라면, 이것을 이해하지
못할 것이다, 하지만 다른 모델 파일 포멧을 찾아 보면 금방 알게 될 것이다 ;)) 그리고 두구두구두구, 이 포멧은 초 완죤
공짜라는 것이다!!! (ㅋㅋ, 조심할 것은 모델(파일)은 공짜가 아니라는 것!).
그래서 뭐? 여기 이 기사(article)에서 보여줄 개요가 있다 :
- MD2 파일 포멧
- CMD2MODEL 클래스 만들기
- MD2 모델을 읽어서 메모리에 담기
- 스크린에 뿌리기
- 활동만화(애니메이션:Animation)
게다가, 소스 코드는 전적으로 공짜이며 이 문서 말미에서 다운로드 받을 수 있도록 했다.
시작하기 전에 이 글을 읽을 여러분들이 C++과 OpenGL API에 익숙하다고 가정할 것이다. 그래 아자아자!! MD2파일 포멧에 대한 몇가지 이론으로 시작해 보자!
MD2 파일 포멧
대부분의 파일 포멧들과 마찬가지로, MD2 파일 포멧은 두 부분으로 구성되어 있다( 헤더, 데이타). Header 는 매우 중요한 변수 몇 개를 포함한다. 이 헤더에 있는 변수는 파일 데이타를 읽기전, 포멧의 마법 번호나 버젼, 파일 크기와 같은 정보를 읽을 때 사용된다, 그래서 헤더의 파일내 자료 사이즈는 항상 동일하다. 그것이 헤더가 구조화되어 있는 이유이다. 반대로, 데이타의 사이즈는 파일마다 다양한 꼭지점, 삼각형, 직조물(texture) 좌표, 등에 따라서 다양하다. Figure 1 파일 구조 표현 :

여기, MD2 헤더 구조 정의가 있다(md2_t로 명명한다) :
// md2 header |
좋다, 내가 위 변수를 자세히 설명해보겠다.
먼저 "마법 숫자"가 뭐로
불려지는가를 알아야 한다. 파일을 메모리로 읽어 올 때, 값을 확인하고 "IPD2"인지 확인한다. 만약 "IPD2"가 아니면,
읽어 오는 것을 멈추고 파일을 닫아야한다. MD2파일이 아니기 때문이다. 다음 변수는 파일 버젼을 가리킨다. 값은 무조건
8이어야 한다.
그 다음 표면입히기(texture)의 크기(width*height)를 획득해야 한다. md2
모델 텍스쳐는 다른 파일에 저장되어 있기 때문에 이 변수를 사용하지는 않을 것이다, 대부분 PCX나 TGA파일이며, 이 파일로
부터 크기(width*height)를 얻는다.
framesize는
각 프레임의 bytes에 크기를 명시한다. 예~ 근데 프레임이 도대체 뭐야? 프레임은 영화에서 한 장의 그림과 같다. 특정
속도로 수많은 프레임이 반복해서 돌면서 애니메이션(그림 연속 연사)을 그려낸다! 그래서 한 프레임은 모델의 꼭지점과 삼각형을
부분적인 위치에 저장한다. 그렇게 해서 구식형 md2 파일은 21개의 애니메이션에 분산된 199개의 프레임으로 구성된다.
한
개의 프레임은 이 프레임이 모든 삼각형을 위한 꼭지점들의 리스트를 포함한다( 각 프레임은 삼각형의 동일한 숫자를 갖는다). 한
순간동안, 각 프레임에 저장하기 위해서 할당되어져야 하는 메모라가 어느정도 드는지 알기 위해서 이 변수들이 필요하다는 것을
기억해라.
다음 변수들은 매우 유사하다.
num_skins은 이 모델을 위해 가능한 텍스쳐의 갯수를 말한다.예를 들어, 한 팀 게임에서 red team과 다른 blue 팀을 위해서 표면입히기(텍스쳐)를 가질 수 있다. 각 텍스쳐의 이름은 파일의 ofs_skins 주소에 64 bytes의 배열로 저장된다. 하지만 우리는 이름을 사용하지 않을 것이다.이유는 Quake2 경로에 명시되어 있기 때문이다, 예를 들어 : "player/ogro/igdosh.pcx".
num_xyz는 모델 꼭지점의 전체 양이다. 각 프레임의 꼭지점 갯수의 합과 일치한다.
num_st는 파일의 ofs_st주
소에 저장되어 있는 테스쳐 좌표의 갯수이다. 이 숫자가 부득이 하게 꼭지점의 숫자와 동일하지 않다는 것에 주목하라. 우리
코드에서는 이 텍스쳐 좌표를 구하기 위해서 다른 방법을 사용할 것이다. 그래서, 실시간으로 파일에서 텍스쳐 좌표 배열을 읽어 올
필요는 없다.
num_tris는 모델에 있는 삼각형의 전체 갯수를 나타낸다.
num_glcmds는
OpenGL명령의 갯수이다. GL 명령어 리스트는 숫자 배열이며, 구식형 삼각형(GL_TRIANGLES) 대신에, 단지 삼각형
펜(fans;부채꼴모양)과 삼각형 스트립(strip;가늘고 긴 조각;널판지;활주로) (GL_TRIANGLE_STRIP 와
GL_TRIANGLE_FAN)을 이용해서 렌더링을 하도록 허락한다. GL 명령어는 매우 파워풀 하다. 약 10 또는 15
fps보다 더 빠르게 렌더링을 하는 것은 일도 아니다!
마침내 벌써 num_frames을 하게 되었다. 모델들을 갖고 있는 프레임들의 전체 갯수를 명시한다. 사실 그들 각각은 keyframes에
연결된다, 그것은 분리된 시간 간격들로 부터 취해지는데, 이유는 애니메이션 별 200 또는 300 프레임을 가질 수 있도록 했기
때문이었다! 결과적으로, 각 애니메이션을 위해서 이들 몇몇을 고수하고, 렌더링할 때 필요한 모든 중간 생성된 프레임을 계산 할
것이다. 렌더링은 선형 보간(interpolation)법을 사용한다(나중에 설명할 것이다). Figure 2를
예로서 보자. 풀로 디스플레이되기 위해서 20프레임이 필요한 한 애니메이션으로 간단한 모델을 나타내려 하지만 단지 3개만
유지된다. 1~4, 6~9, 11~14 그리고 16~19 의 순번 사이에서 부드러운 애니메이션을 얻기 위해서 렌더링 하기 전에
반드시 다음에 그릴 프레임을 미리 계산해 둬야 한다.

헤더 변수의 마지막 블럭은 모델 데이타의 다른 유형에 엑세스하는 주소(offsets)를 포함한다.
ofs_skins 는 모델 텍스쳐 이름을 가리킨다.
ofs_st 텍스쳐 좌표를 가리킨다.
ofs_tris 꼭지점을 가리킨다.
ofs_frames 모델의 첫 번 째 프레임을 가리킨다.
ofs_glcmds OpenGL 명령어 리스트를 가리킨다.
ofs_end 파일의 끝을 가리킨다(여기서는 필요 없다).
와우~ 헤더는 끝냈다! 이제부터 모델 데이타를 저장하기에 필요한 구조체에 집중해 보자! Header처럼 프레임, 꼭지점들 그리고 OpenGL명령어 리스트 등을 갖는 구조체를 사용할 것이다.
대부분의 3D 애플리케이션에서 매우 유용한 첫번 째 데이타는 벡터(Vectors)이다! 복잡하게 얽힌 벡터 클래스는 필요 없고 간단하게 갈 것이다 : 간단한 3 개의 float 배열로 구성된 벡터를 나타낼 것이다!
typedef float vec3_t[3]; |
각 모델은 (num_frame * num_xyz) 꼭지점들로 구성되어 있다. 여기, 한 개의 꼭지점 좌표를 갖는 구조체가 있다 :
// 꼭지점(vertex) |
v[3]가 vertex' (x,y,z) 좌표를 포함한다는 것에 주목해야 할 것이다. 이유는 unsigned char 자료형이라서 이 좌표들은 0에서 255 까지만 가능한 영역을 갖는 사실 이 3D 좌표들은 (만약 float나 vec3_t를 사용해야 한다면 12를 대신에 3 bytes로) 압축되어져 있다. 압출을 풀려면, 각 프레임에 적절한 다른 값을 사용해야 할 것이다. lightnormalindex 는 사전에 계산된 표준 테이블을 가리키는 인덱스이다. 표준 벡터들은 광원을 위해서 사용되어질 것이다.
하나의 꼭지점을 위해서 필요로 되어지는 정보의 마지막 조각은 그것의 표면을 입히기 위한 텍스쳐 좌표들이다. 그것들은 아래의 구조체로 묶여이다 :
// 표면입히기 좌표(texture coordinates) |
꼭지점들 때문에 데이타는 압축되어져 있다. 여기서 표면입히기(Texture) 좌표를 저장하기 위해 float (4 bytes)대신에 short (2 bytes)사용하고 있다. 하지만 그것들을 사용하려면, float로 값을 변화시켜야 하는데, 이유는 0.0 에서 1.0의 영역을 갖는 표면입히기(텍스쳐) 좌표때문이다. 그리고 만약 short 값을 고수하려면, 단지 0또는 1의 값과 중간값만으로 갖게 되었을 것이다! 그럼 압축은 어떻게 풀지? 그것은 매우 간단한데. 텍스쳐 크기로 short를 나누면 된다.
RealST[i].s = (float)texCoord[i].s / header.skinwidth;
RealST[i].t = (float)texCoord[i].t / header.skinheight;
RealST가 texCoord_t와 닮은 구조체의 객체라고 가정하자. 하지만, short 자료형 대신에 float로 선언되어 있고 texCoord은 MD2 파일에서 불러온 texCoord_t 배열이다.
모델의 각 프레임( 또는 키 프레임)은 아래와 같이 정의된 구조체안에 있다 :
// frame |
각 프레임은 frame_t 구조체로써 저장되어 진다. 이 구조체가 모든 명시된 데이타를 갖고 있다. 그래서 전통적인 모델들은 199 개의 frame_t 객체들을 갖는다. 프레임 데이타를 사용하는 꼭지점의 압출을 푼다고 몇 분전에 말했었다. 여기 그 데이타가 있다! 각각의 꼭지점의 압축을 풀기 위해서, scale[3] 값으로 좌표를 곱해서 크기를 조절한 다음 translate[3] 벡터로 그것을 옮길 것이다. (float translate[3]을 대신해서 vec3_t translate을 또한 쓸수 있었다)
name[16]는 프레임의 이름을 간단화 시킨다. 마침내, verts[1]는 프레임의 첫 번 째 꼭지점이다. 이 프레임의 다른 꼭지점들은 첫번째 꼭지점 이후에 저장된다. 그래서 이와 같이 그것들에 접근 가능하다:
frame.verts[ 2 ] // 프레임의 두번 째 꼭지점을 획득한다
frame.verts[ i ] // 프레임의 i 번 째 꼭지점을 획득한다.
frame.verts[ num_xyz - 1 ] // 이 프레임의 마지막 꼭지점을 획득한다.
따라서, 우리는 실 꼭지점 좌표들을 획듣한다 :
vertex.x = (frame.verts[i].v[0] * frame.scale[0]) + frame.translate[0]
vertex.y = (frame.verts[i].v[1] * frame.scale[1]) + frame.translate[1]
vertex.z = (frame.verts[i].v[2] * frame.scale[2]) + frame.translate[2]
where i ranges from 0 to (num_xyz - 1).
애니메이션, 프레임 그리고 꼭지점간의 관계의 표현을 보려면 Figure 3을 봐라.

그래서 각 애니메이션은 각 num_xyz 꼭지점들을 포함하는 프레임을 갖는다.
각 텍스쳐 좌표의 짝을 이용해서 각 꼭지점을 연결 할 필요가 있다. 하지만, 하나의 texCoord_t와 하나의 vertex_t를 연결하는 대신에, 그것들은 세쌍으로 삼각형이나 그물망으로 연결될 것이다.
// triangle |
이것이 파일에 저장되는 방법이다. index_xyz와 index_st는 데이타 자신이 아니라 데이타의 인덱라는 것에 주목해라! float자료형과 유사한 구조에서, 만일 당신이 모델을 읽어오는 동안 압축을 푸는 것이 더 좋다고 한다면, 그 데이타는 vertex_t 와 texCoord_t 배열을 반드시 분리해서 저장하는 것이 좋다. Vertices[] 는 vertex_t의 배열이라 가정하고, TexCoord[] 는 texCoord_t의 배열로, Meshes[] 는 triangle_t의 배열로 그리고 anorms[] 는 vec3_t(모든 사전 계산된 평균 벡터들의 저장)의 배열이라고 가정하자. 당신은 아래 메소드를 이용해서 모델을 그릴 수 있을 것이다 :
glBegin( GL_TRIANGLES );

// 각 삼각형을 그린다.
for( int i = 0; i < header.num_tris; i++ )
{
    // draw triangle #i
    for( int j = 0; j < 3; j++ )
    {
        // k 는 그리기 위한 프레임이다.
        // i 는 프레임의 현재 삼각형이다.
        // j 는 삼각형의 현재 꼭지점이다.

        glTexCoord2f( (float)TexCoord[ Meshes[i].index_st[j] ].s / header.skinwidth,
                           (float)TexCoord[ Meshes[i].index_st[j] ].t / header.skinheight );

        glNormal3fv( anorms[ Vertices[ Meshes[i].index_xyz[j] ].lightnormalindex ] );

        glVertex3f( (Vertices[ Meshes[i].index_xyz[j] ].v[0] * frame[k].scale[0]) + frame[k].translate[0],
                        (Vertices[ Meshes[i].index_xyz[j] ].v[1] * frame[k].scale[1]) + frame[k].translate[1],
                        (Vertices[ Meshes[i].index_xyz[j] ].v[2] * frame[k].scale[2]) + frame[k].translate[2] );
    }
}

glEnd();
그래 화면으로 보여지는 것은 정말 쉽지 않다. 방법이라면 GL_TRIANGLES를 사용하는거다. 우리는 GL_TRIANGLE_SRTIP와 GL_TRIANGLE_FAN를 사용해서 보다 낳은 퍼포먼스를 획득할 수 있다. 하지만 어떻게 할 것인가? 그것은 OpengGL 명령어를 사용하는 것이다!
아래 그림이 그 데이타 구조에 대한 모든 것이다! 전체 파일의 구조이다 :

CMD2MODEL 클래스 만들기
OpenGL 명령어에 감사하자, 우리는 triangle_t와 texCoord_t
구조들을 사용할 필요가 없다. 왜냐하면 이런 모든 것들이 OpenGL 명령어 리스트에 포함되어 있다, 우린 그것을 사용할
것이다. 만약 OpenGL 명령어들을 사용하고 싶지 않을 경우나, 또는 OpenGL을 사용해서 렌더링(그리기)하길 원치
않는다해도 어쩔 수 없다. 여기서 다루지 않을 것이다.
우리는 지금 MD2 모델을 표현할 클래스를 만들 준비가 되었다. 여기 원형(prototype)이 있다 :
// ============================================ |
각 MD2 모델은 CMD2Model object이다. 흠 이 클래스는 frame_t object 나 vertex_t object 도 없는 것이 매우 이상하게 보인다! 그리고, 텍스쳐 좌표는 어디 저장될까? 어느 정도의 설명이 요구된다...
우선, 모든 멤버변수를 0 (excepted m_scale)로 초기화하고 데이타 로딩중에 할당된 메모리를 해제시키는 구식형 생성자와 소멸자를 만든다.
함수란 뭔가? 내 생각엔 스스로-설명하는(self-explanatory)거라고 본다. LoadModel()는 파일에서 모델을 읽고 그것을 초기화한다. 그리고, LoadSkin()는 표면입히기(Texture)를 읽어와서 m_texid를 초기화 한다.
DrawModel()은 모든 변환(Transform)방식으로 연산된 모델을 애니메이션해서 그리는데 사용된다. 인수 time 은 활동 애니메이션(활동 만화)으로 부터 렌더링하려는 프레임을 계산하는데 필요하다.
DrawFrame()은 특정(명시된;그림을 그리기 위해 환경 설정된) 프레임에 모델을 그리도록 한다.
SetAnim() 과 ScaleModel() 은 현재 애니메이션과 크기 값을 설정하도록 한다.
Animate(), ProcessLighting(), Interpolate() 그리고 RenderFrame() 는 private 함수인데 이유는 public DrawModel() function안에서 사용되어져야 한다. 그것들은 보간(interploate)되고 빛이 가해진 적절한 프레임을 그리도록 모든 계산을 처리한다.
이제부터 멤버 변수들을 보자. anorms는 사전에 계산된 표준 벡터 배열이다. 각 꼭지점은 그 소유의 표준 벡터에 접근하기 위해서 *m_lightnormals 배열안에 저장되어 있는 인덱스를 갖게 될 것이다. anorms_dots는 anorms와 유사해 보이지만, 사전에 계산된 돗(dot) 생산물을 저장할 때만이다. 광원을 처리할 때 그것이 필요 할 것이다. animlist는 애니메이션 배열이다. 여기 anim_t 구조체의 원형이 있다 :
// animation |
마지막 세개의 숫자형 변수가 정적변수라는 것에 주목해야 할 것이다. 모든 MD2 모델이 동일해서 단 하나의 복사본이 필요한 이유이다.
다음, 프레임의 전체수를 담고 있는 num_frames, 각 프레임당 꼭지점 수 num_xyz와 OpenGL 명령어 수 num_glcmds를 갖는다.
*m_vertices는 각 꼭지점을 위해서 실수형 숫자로 3D 좌표를 갖는다. 예~ 하지만 문제가 있다. 각 꼭지점이 *m_lightnormals배
열에서 어떤 곳에 저장되어 있는 표준 벡터를 가리키는 정당한 인덱스를 갖을 꺼라는 것을 미리 말해 둔다. 이 배열이 꼭지점에
대한 모든 데이타를 포함한다면, 인덱스는 어디 저장되는가? 그 대답은 OpenGL명령어 리스트를 저장하는 *m_glcmds
배열에 있다. 한동안, "OpenGL 명령어들"을 두려워하지 마라, 그것은 단지 마법이라고 말해라. 모델
메쉬(meshes;망;올가미;그물;그물실)를 그리기 위해서 필요한 것들이라는 것을 설명할 것이다. 여기 세 개의 마지막
배열때문에, 메모리를 동적으로 할당 한다.
m_texid 는 OpenGl 표면입히기(texture) 대표값(IDentity)을 저장 할 것이다. m_anim 는 현재 애니메이션이 움직이는데 필요한 정보를 저장한다. 그것은 animState_t이다(자세한 설명은 주석 참조) :
// 애니메이션 상태 |
마지막으로, m_scale은 모든 축의 크기값을 저장한다. 표준(normal) 벡터의 크기를 변경해야 하고, 광원효과를 이끌어 내야 하기 떄문에 glScalef()를 사용하는 것보다 m_scale값으로 곱해서 꼭지점의 크기를 바꾸는 것이 좋다.
triangle_t이나 texCoord_t 구조체를 사용하지 않겠다고 말해왔지만, 왜 vertex_t 와 frame_t structures을 사용하는가? 우린 단지, LoadModel() function에서 모델을 로딩할 때, 그리고 *m_vertices 와 *m_lightnormals 배열에 저장된 프레임 데이타를 변환(transform)할 때에만 사용할 것이다.
이 섹션을 끝내기 전에, 당신은 생성자와 종결자 정의를 해 줬으면 한다 :
// ---------------------------------------------- |
생성자를 정의 할 때, (상수형 변수와 m_scale를 제외 시킨 모든 멤버 변수를 0 으로 설정한다. 만약 0으로 설정해서 렌더링이 안된다고 한다면 m_scale 을 1.0으로 설정한다. 클래스 종료(destructor)시에 메모리를 반환한다...
좋다, 진짜 시작할 준비가 되었다! 다음 섹션으로 넘어가자 : MD2 모델 파일 읽기로!
MD2 모델을 읽어서 메모리에 담기
LoadModel() function에 파일이름을 넘겨서 MD2 모델을 읽을 것이다. 만약 선공하면 true 아니고, 읽는 중에 실패를 하면 false를 반환한다. function의 첫 번째 부분을 보자 :
// ---------------------------------------------- |
먼저, 모델을 읽어올 동안 필요한 몇몇 지역변수를 정의한다. file은 파일로 부터 모델 데이타를 추출하기 위한 파일 스트림이다. header는 모델 파일의 헤더를 저장하는 md2_t 객체이다. 다음 *buffer를 갖는다. 이것은 모든 프레임 데이타를 저장하는 큰 버퍼이다. 세 개의 마지막 변수는 *buffer로 부터 데이타에 접근하는 서로 다른 위치들이다.
읽기 전용 모드로 명시된 파일을 열어본다. 만약 오류가 있다면 false가 반환된다. 파일이 열렸다면 다음 모델 헤더를 불로온다. 그렇게 해서 매직 번호(md2 파일 인식용)을 확인하고 MD2 파일로 확신되는 모델 버젼을 확인한다. 인식 문자열은 항상 "IDP2"이고 모델 버젼은 8이다. 그래서, 이와 같이 MD2_IDENT 와 MD2_VERSION을 정의 할 수 있다 :
// 마법 숫자 "IDP2" 또는 844121161 |
인식번호가 844121161인지 strcmp() function으로 확인해야 한다(ident는 반드시 char [4]이어야 한다).
MD2파일이 올바른지 확인해라, 그럼 계속 불러 올 수 있을 것이다 :
// member 변수 초기화 |
먼저 모델 헤더로 부터 숫자형 변수들을 초기화 한다. 그다음 m_vertices, m_glcmds, m_lightnormals 그리고 buffer arrays에 필요한 메모리를 할당한다.*m_vertices and *m_lightnormals의 엘리먼트 수가 동일하다는데 주의하라. 그렇게 해서, 평균(normal) 인덱스에 혹은 3D좌표상에 두개를 가리키는 하나의 인덱스를 갖고 있다. m_glcmds 배열에서 포인터(주소)를 획득할 것이다.
메모리는 파일에서 데이타를 읽서 할당된다. 데이타를 읽기 전에, 헤더의 오프셋(offsets:위치)에 명시된 위치로 이동한다. 일단 프레임 데이타와 OpenGL 명령어를 읽는다. buffer로 *m_vertices 와 *m_lightnormals 를 아래와 같이 초기화 한다 :
// 꼭지점 배열 초기화 |
이것은 이해하기 꾀 힘들다. 먼저 각 프레임을 하나씩 순회한다. 각 프레임에 대해서, 함수의 시작위치에 정의된 frame_t* pointer를 사용한 buffer로 부터 데이타를 추출한다. 그렇게 해서 *m_vertices 와 *m_lightnormals에 위치들을 적용한다. 그렇게 해서 그것들은 현재의 프레임 데이타를 반드시 저장하고 있는 시작점에 위치시킨다.
그 다음, 처리하려고 하는 현재의 프레임의 각 꼭지점들을 순환한다. 전에 (MD2 파일 포멧을 다룬 섹션에서) 설명한 공식으로 꼭지점의 3D 좌표를 초기화 한다. 그리고 또한, 꼭지점 vertex_t structure에 담고 있는 평균(nomral) 인덱스를 초기화 한다.
세 개의 숫자형 변수와 세 개의 데이타 배열을 초기화 해서, 모델 파일을 끝냈다! 어려웠나? 이제 파일을 닫기만 하면 된다. *buffer을 비우고(free) true을 반환한다:
// 버퍼 메모리 비우기 |
지금 왜 직조물(texture)을..? 텍스쳐를 위해서, 텍스쳐 아이디를 m_texid에 담을 것이다. MD2의 텍스쳐들은 고전적 그림 포멧인 TGA나 PCX파일에 저장해 둔다.파일에서 텍스쳐를 읽어 오는 것은 이 기사(article)의 범위를 넘는다. 그래서 여기선 다루지 않을 생각이다. 나는 여러분이 텍스쳐를 읽어와서 유용한 ID(아이디)를 반환 할 수 있을거라 가정한다. 다운 받을 수 있는 소스코드에서, PCX 파일의 targa 즉 비트맵(bitmap)에서 텍스쳐를 읽어서 초기화 할 수 있는 간단한 Texture manager를 만들어 뒀다. 여기, LoadSkin() function으로 텍스쳐를 어떻게 읽는지 보여준다:
// ---------------------------------------------- |
내가 만든 Texture Manager에 대해서 간단하게 한마디 한다면 :
먼저, 보다 쉽게 코드를 읽기 위해서 inline LoadTexture() function 을 작성했다. 이 펑션은 텍스쳐 관리자의 LoadTexture() function에 접근한다. Texture Manager는 singleton 으로 구현되어졌다.
초
기화 할 때, 기본 텍스쳐를 생성한다( 그것은 흑백 확인자이다). 파일에서 텍스쳐를 불러 올 때, 우선 기존에 불러온 텍스쳐인지
판단한다. 만약 yes라면 텍스쳐 ID(아이디)를 반환한다, 그렇지 않다면 파일을 읽어올 것이다. 존재하지 않으면 디폴트
아이디를 반환한다. 그래서 texmgr.LoadTexture( "default" )를 호출할 때, 이것은 텍스쳐를 부르지 않고 기본 텍스쳐 아이디를 반환한다. 반활 할 때, 테스쳐가 로드될 때 우리에게 주어진 텍스쳐 아이디를 확인하는데, 디폴트 텍스쳐 아이디가 동일하면 false를 반환한다.
이것이 이번 섹션의 전부이다. 우리에게 필요한 모든 데이타를 로드했다.
모델 그리기
우리가 불러온 모델을 렌더링(그리기)할 때가 되었다!
DrawModel()이 모델을 그리는 주요 펑션이다. 어찌되었던 이 함수가 모델을 직접적으로 렌더링하지는 않고, 몇몇 변경행위를 처리할 것이고, RenderFrame() 함수를 호출하기 전에 계산할 것이다. 함수 정의에 집중해보자 :
// ---------------------------------------------- |
자, 잠시 렌더링 하기 전 간단하게 두 개를 회전한다, time 인수는 사용되지 않는다... 하지만 나중에 애니메이팅(만화 연사)할 때 이 함수를 수정할 것이다!
GpenGl을 사용해서 저장하지 않기 때문에 X 와 Z 축에 있는 모델을 회전시킬 필요가 있다. 외 그렇게 하는지 알려면 glRotatef()를 두번 부르는 것을 말할 수 있다 :)
한 참 앞에서 언급한 적이 있는 m_scale value and ScaleModel() function을 기억해라. 렌더링이 끝날 때 화면에 큰 모델을 그려지는 것을 피하기 위해서, 우리는 렌더링 하는 현재 프레임의 각 꼭지점의 사이즈를 조절한다. RenderFrame()에 서 호출하는 Interpolate()을 이용해서 크기조절 기능을 사용할 수 있다. 일반적으로 꼭지점 보간법이 크기조절만을 이야기 하는 것은 아니다, 하지만 애니메이션을 할 동안이 아니기 때문에, Interpolate() function이 꼭지점의 크기를 조절할 것이다. 이후에, 두 개의 프레임으로 꼭지점을 진짜 보간 하도록 수정할 것이다. 여기 코드가 있다 :
// ---------------------------------------------- |
이 함수는 크기 변경된 꼭지점을 갖는 현재의 프레임으로 꼭지점의 배열을 초기화 한다. 그렇게 해서 RenderFrame() function는 렌더링을 위해서 인수로 넘겨서 배열을 사용할 것이다. 하지만 original m_vertices 배열을 직접적으로 사용하지 않을 것이다. 마찬가지로 m_vertices보다 vertlist를 더 쉽게 조작할 수 있다.
지금 광원에 대해서 조금 언급할 것이다. 모델에 광원을 주는 방법은 두 가지가 있다. 첫 번째는 openGL 광원 함수를 사용하는 것이다. 예를 들어, 렌더링할 각 꼭지점의 표준을 설정하기만 하면 된다. 어려운 곳은 없다, *m_lightnormals 저장된 인덱스가 anorms table에수 미리 계산된 표준치를 준다.
두 번째 방법은 각 꼭지저미 광원관 쉐이딩(shade;그늘;그림자)을 한 것 처럼 하기 위해서 glColor()을 사용한다. 마찬가지로 Quake II 엔진에서 사용된 바업이다. 이 방법으로, 몇 가지 일을 할 수 있게 한다. 그렇게해서 ProcessLighting() function에서 모든 것을 넣어 둘 것이다. Interpolate()함수처럼 RenderFrame()에 의해서 호출된다. 하지만 그전에, 몇개의 전역 변수를 생성하고 다른 것들을 초기화 할 필요가 있다...
// 사전 계산된 평균 값 수(number of precalculated normals) |
사전 계산된 표준값(normal)과 돗(dot) 리스트는 두 개의 큰 것이 있는데 그렇게 흥미롭지는 않다. 그것들은 ( 상수 배열을 초기화 하는 것을 포함해서 간단화 시킨 ) 헤더 파일에 저장되어 있다.
shadedots 는 ProcessLighting() function에 맞춰진 포인터이다. anorms_dots array의 요소안을 가리킬 것이다.
lcolor 는 마지막 광원색을 위한 RGB값을 저장할 것이다.
마지막으로, 세 개의 마지막 전역 변수는 ambient(주변을 둘러싼;에워싼;포위한) 광원 값(0~255)과 그림자 만드는 값(0~25) 그리고 빛츠로 부터 오는 각(angle 범위: 0.9~360.0)가 있다.
여기 ProcessLighting() function가 정의되어져 있다 :
// ---------------------------------------------- |
우선, 마지막 광원 색깔 (lcolor)를 초기화하기 위해서 사용하는 지역변수를 생성한다. 다음에, shadedots포인터에 맞춘다. 그 공식은 매우 복잡한다, 하지만 걱정하지 마라, 우리가 원한 만큼 잘돌아 간다 ;) Quake II 소스코드에서 가져 온 것이다.
이제 각각의 삼각형을 그리자! 현재 프레임의 각 삼각형을 그리는 코드의 조각을 줄 때 이 문서의 시작점에 기억해라. 나쁜 것은 GL_TRIANGLES을 사용해서 그리는 것이다, 그리고 그것을 위해서 각 삼각형의 세 개의 꼭지점을 명시할 필요가 잇다. 게다가, 더 많은 삼각형을 그리기 위해 더 적은 꼭지점들이 필요한 GL_TRIANGLE_STRIP or GL_TRIANGLE_FAN를 사용해서 렌더링 하는 것보다 더 느리다. Figure 5가 이런 아이디어를 보여 준다 :

GL_TRIANGLE_STRIP 와 GL_TRIANGLE_FAN를
이용한 전체 모델을 그릴수 있어야 한느 것이 최선책이다. 이것이 gl 명령어들을 만드는 전부이다! OpenGL 명령어 리스트는
부분적인 정수배열이다. 우리는 리스트의 시작을 가리키는 포인터를 초기화 할 것이다 그리고 포인터가 OpenGL 명령 리스트
마지막 값을 0.0을 반환 할 때 까지 읽는다. 자 어떻게 작업 하지?
- 첫 번째 값을 읽는다. 이 값을 두 개를 가리킨다 : 그리기 위한 꼭지점 유형 (숫자가 양수이면GL_TRIANGLE_STRIP, 숫자가 음수이면 GL_TRIANGLE_FAN ) 그리고 렌더링 모드로 그리기 위한 꼭지점의 수.
- n * 3 다음 값은 그리기 위한 꼭지점에 대한 정보를 저장한다.
- The two first are (s, t) texture coordinates and the third is the vertex index to draw.
- 이 그룹의 모든 꼭지점이 처리될 때, 신규 값을 읽어서 신규 그룹을 얻는다... 만약 읽은 값이 0(zero)이면 작업완료이다!
처음엔 정말 쉽질 않다. 하지만 연습좀 하고 나면 진짜 쉽다는 것을 알게 될 것이다 ;) OpenGL명령 리스트를 나타내는 Figure 6을 봐라 ( 각 삼각형은 하나의 정수형 값인 명령을 나타낸다 ) :

앗싸~ 이론은 끝났다 :) 이제 코드다 :
// ---------------------------------------------- |
두 개의 지역 변수를 생성하는 것으로 시작한다. vertlist[]는 렌더링하려는 프레임의 꼭지점을 보간(interplate;끼워넣다)하고 크기를 바꿔서 포함하는 3D 실수형 좌표 배열이다. 배열은 static이어서 단 한 번만 선언되어 진다. 이 함수의 각각의 호출에 신규 배열을 생성하는 것 보다 퍼포먼스 증가를 위해 더 좋다. 배열 크기는 상수이고 모델이 취할 수 있는 꼭지점의 최대 갯 수이다.
*ptricmds는 두 번째 변수이다. OpenGL 명령어들을 읽을 포인터이다.
다
음 폴리곤(polygon) 속성들을 저장하고, GL 명령어들 때문에 앞면(front-facing) 폴리곤의 진로를 반전시키고
뒷면(backface) 짝지기를 가능하게 한다. 우리는 광원을 위해서 필요한 모든 계산을 처리하고, 꼭지점을
삽입(interpolate)하고 그 크기를 변경한다, 그리고 모델 표면입히기(texture)를 한다.
모든 것이 while 구문에서 렌더링 된다. 먼저 그림을 그리는 삼각형과 꼭지점 수를 획득한다. for 문장에서 각 꼭지점을 분석한다. 왜냐하면, 꼭지점이 gl 명령어 리스트에 저장된 세 값들을 갖고 있기 때문이다.
각 꼭지점을 위해서, 광원 각도(angle)를 위해 돗(dot)단위로 생성된 포인터와ProcessLighting()함수로 계산된 마지막 광원 만들기를 사용해서 광원 빛을 설정한다. 표면입히기(Texture)좌표계는 int에서 float로 형변환이 된다. 꼭지점 anorms 테이블로 부터 표준 벡터를 얻어서 막 초기화 하기 전에 꼭지점을 그린다(렌더링 한다).
OpenGL 광원을 사용하지 않겠다면, glNormal3fv()를 호출로는 아무것도 할 수 없고, 그것을 사용한다면, glColor3f호출이 어떠한 영향도 미치지는 않는다.
애니메이팅(만화 연속 뿌리기)
3D 모델은 그것들이 연속적으로 그려질 때 더 좋아 보인다! 그래서 모든 것이 연속적으로 뿌려지도록 한다. ;)
static animlist배열을 기억해라. 모든 최소의 애니메이션 데이타를 저장하기 위해서 설계되어져 왔다, 그것은 처음과 마지막 프레임의 인덱스를 말하는 것이고, 애니메이션을 돌리기 위한 fps 연산을 말한다. 이런 모든 것이 우리가 전에 이미 봐왔던 anim_t 구조체로 다시 그룹핑 되어 진다. 여기 초기화하는 것이 있다 :
// ---------------------------------------------- |
애니메이션 데이타에 접근하기 위한 엔덱스를 사용할 것이다, 하지만 소스코드의 의존성 때문에 각각의 인덱스를 위해 매크로를 정의하는 것이 좋다 :
// animation list |
현재 애니메이션 데이타는 m_anim에 저장되어 있지만 anim_t structure와 조금 차이가 있다. 그래서 애니메이션을 설정하기 위해서 애니메이션 데이타를 읽어 와서 그것으로 현재 애니메이션 데이타를 초기화 해야만 한다.이것이 SetAnim() 함수의 할 일이다 :
// ---------------------------------------------- |
먼저 type이 올바른지 확인한 다음 m_anim의 멤버변수들을 초기화 한다. 막 정의된 매크로를 type해서 지나 갈 수 있다.
자 새로운 함수를 보자 : Animate(). 이 함수는 DrawModel() 로 불려질 것이다, 그래서 다시 작성해야만 한다 :
// ---------------------------------------------- |
여기서, 만약 time이 0.0보다 크다면 그림을 연사 한다. 그렇지 않으면 그림은 연사되지 않는다, 모델은 정적이다. Animate() 함수 소스 코드를 보자 :
// ---------------------------------------------- |
처음엔, 함수가 현재 애니메이션에 명시된 ftp 카운트를 사용해서 처음과 다음 프레임을
계산한다. 두 번째엔, 이 값들을 확인하고, 그것들이 올바른 값인지 증명한다. (모델을 잡고 있는 프레임의 전체수보다 반드시
작아야 한다.) 마지막으로, 애니메이션 ftp 카운트와 시간으로부터 보간율(interpolation percent)을 계산한다.
꼭 Interpolate()
함수를 재확인해야만 한다, 진짜 꼭지점을 보간(interpolate) 하는지. 만약 그렇지 않다면, 모델이 가질 수 있는
프레임의 수 때문에 애니메이션이 너무 빈약한 성능을 낼것이다. 보간법을 사용해서, 프레임의 "무한함(infinity)"를 만들
수 있다(단지 렌더링할 때 필요한 것을 만든다). 공식은 매우 단순하다 :
그렇게 해서, 현재와 다음 프레임들의 모든 꼭지점을 본간(interpolate)해보자. 새로운 Interpolate() 함수는 이와 같이 본다 :
// ---------------------------------------------- |
어쨌든, 보간된 꼭지점의 크기를 조절한다... 그리고 끝난다! 이제 단지 여러분이 선택한 인수로 함수 SetAnim() and ScaleModel()를 호출하면 된다, 그리고 렌더링을 도는 동안 파라메터에 초에 현재시간을 인수로 해서DrawModel()를 호출한다. 그렇게 나쁘지 않다!
그냥 끝내기 전에, 상태등을 그려야 할 필요가 있을 때 어떻게 간단한 프레임을 렌더링 할지를 보여주겠다:
// ---------------------------------------------- |
이 함수는 모델의 명시된 프레임을 렌더링하는 DrawModel()을 호출하기 전에 애니메이션 변수들을 바로잡는다.
결론
자, 드디어 끝이 났다! :)
이
기사는 완벽함과는 거리가 멀지만 개선 시킬 수 있는 것이 많이 있다. 즉, 하나 이상의 개체가 동일한 모델에 의해 표현될 때
다중 시간대에 동일 모델 데이타를 저장하는 것을 피하기 위해서 모델 인수(현재 프레임, 현재 애니메이션,..)로 부터 모델파일
데이타(꼭지점 리스트, 평균값 리스트,...)를 분리하거나 다중 스킨(표면그림)제공을 포함하는 것을 예로 들 수 있다. 간단한
복사만으로 프로그램에 작동하는 CMD2Model class를 완벽하게 하는 것은 어렵다...
여
러분이 이 기사를 통해서 MD2 모델 파일 포멧과 더 일반적인 3D모델 파일을 공부하는데 도움이 되었으면 합니다! 또한 너무
혼란스럽지 않았으면 합니다 ;( 제발 영어로 spam을 보내지 말아 주세요, 전 영어가 모국어가 아니랍니다. 만약, 이 기사에
대해서 이야기(제안,실수,...)를 하고 싶은게 있다면 tfc_duke@hotmail.com 로 보내주세요)
여기에서 (Visual C++ 6.0 version)소스코드, 모델 그리고 무기등을 내려받을 수 있다. 이 기사의 소스코드는 free이며, 숨어있는 서약 없이 퍼트려도 된다. Use at your own risk!
이 문서를 영어버전으로 만드는데 도움을 준 Game-Lab의 Squintik님 감사합니다.


Reference section :
Written by David Henry, 19th December of 2004
MD2 model file format 은 id 소프트웨어가 Quake2를 1997년 11월에 출품하면서 소개 되었다. 그것은 이해하기에 정말 쉬운 파일 포멧이다. MD2 모델의 케릭터는 :
모델의 표면입히기(texture)는 분리된 파일로 존재한다. 한개의 MD2 모델은 동시에 단 하나의 표면입히기(texture)를 갖는다.
MD2 모델 파일의 확장자는 “md2”이다. MD2 파일은 이진파일의 두 부분으로 나뉜다; header, data. 헤더(머리)는 데이타를 조작하고 사용하기에 필요한 모든 정보를 포함한다.
변수 유형과 크기:
위 자료형은 C언어의 x86 구조와 일치한다. 다른 곳에서 컴파일 할 때 자료형의 크기에 신경을 써야 한다. OS 및 언어별 또는 버젼에 따라서 지원되는 자료형의 크기가 다르기 때문이다.
MD2파일이 이진 포멧이어서, 반드시 엔디안(endianess)을 다뤄야만 한다. MD2 파일은 리틀-엔디안(x86)로 저장된다. 만약 빅-엔디안 구조물(PowerPC, SPARC, ...)을 타켓으로 한다거나, 또는 간단하게 이식성있는 프로그램을 만들고 싶다면, 파일을 읽을 때 각 단어 또는 더블(2배)-단어에 대해서 적절한 전환을 수행해야만 한다.
헤더는 파일의 시작점에 있는 구조이다.:
/* MD2 header */
struct md2_header_t
{
  int ident;                  /* magic number: "IDP2" */
  int version;                /* version: must be 8 */

  int skinwidth;              /* texture width */
  int skinheight;             /* texture height */

  int framesize;              /* size in bytes of a frame */

  int num_skins;              /* number of skins */
  int num_vertices;           /* number of vertices per frame(프레임별 꼭지점들)*/
  int num_st;                 /* number of 표면입히기(texture) coordinates */
  int num_tris;               /* number of 삼격형(triangles) */
  int num_glcmds;             /* number of opengl commands */
  int num_frames;             /* number of frames(활동만화 동작들) */

  int offset_skins;           /* offset skin data */
  int offset_st;              /* offset texture coordinate data */
  int offset_tris;            /* offset triangle data */
  int offset_frames;          /* offset frame data */
  int offset_glcmds;          /* offset OpenGL command data */
  int offset_end;             /* offset end of file */
};
ident(식별)은 파일의 마법의 숫자이다. 파일 유형을 식별하는데 사용한다. ident(식별)은 반드시 844121161 과 동일하거나 또는 문자열 “IDP2”와 동일해야 한다. 우리는 (('2'<<24) + ('P'<<16) + ('D'<<8) + 'I') 표현식을 사용하면 얻을 수 있다.
버젼은 파일 포멧 버젼 숫자이며 틀림없이 8이어야 한다..
skinwidth 와 skinheight는 각 모델의 표면입히기(texture) 넓이와 높이이다.
framesize는 프레임과 그 모든 데이타의 바이트(bytes) 크기이다.
num_skins은 모델에 조합된 표면입히기(texture)의 숫자이다.num_vertices 은 하나의 프레임에 대한 꼭지점의 숫자이다.num_st 은 표면입히기(texture) 좌표계의 숫자이다.num_tris 는 삼각형(triangles)의 숫자이다.num_glcmds 은 OpenGL명령어의 숫자이다.num_frames 은 모델이 갖는 프레임의 숫자이다.
offset_skins 은 파일 시작에서 표면입히기 데이타에 연결하는 것을 바이트로 위치를 지시한다.offset_st 는 표면입히기(texture) 좌표계 데이타의 위치를 가리킨다.offset_tris 는 삼각형(triangle) 데이타의 위치를 가리킨다.offset_frames 는 프레임 데이타의 위치를 기리킨다.offset_glcmds 는 OpenGL 명령들의 위치를 가리킨다.offset_end 는 파일의 끝 위치를 가리킨다.
벡터, 실수형 좌표계(x, y, z)로 구성된다:
/* Vector */
typedef float vec3_t[3];
Texture 정보는 모델을 연결하는 표면입히기 이름의 리스트이다:
/* 표면입히기(Texture) 이름 */
struct md2_skin_t
{
  char name[64];              /* texture file name */
};
Texture 좌표계는 short 정수형으로 구조화되어 저장된다. 올바른 표면입히기(texture)좌표계를 획득하기 위해서, 반다시 skinwidth 나누기 s, skinheight 나누기 t를 해줘야만 한다:
/* 표면입히기 좌표계(Texture coords) */
struct md2_texCoord_t
{
  short s;
  short t;
};
각 삼각형은 꼭지점을 지시하는 배열과 표면입히기(texture) 좌표계를 지시하는 배열을 갖는다.
/* 삼각형 정보(Triangle info) */
struct md2_triangle_t
{
  unsigned short vertex[3];   /* 삼각형의 꼭지점 인덱스 */
  unsigned short st[3];       /* tex. coord. indices : 표면입히기. 좌표계. 인덱스 */
};
꼭지점은 “압축된” 3D 좌표계로 구성되어진다, 그것은 1 바이트 좌표로 저장되고, 보통 벡터 인덱스로 관리된다. 보통 벡터 배열은 Quake 2의 anorms.h 파일에 저장되고 실수형 좌표(3 float)의 162 개의 벡터 를 갖는다.
/* Compressed vertex */
struct md2_vertex_t
{
  unsigned char v[3];         /* position */
  unsigned char normalIndex;  /* normal vector index */
};
프레임들은 그자신과 꼭지점 좌표 리스트에 대한 구체적인 정보들을 갖는데. 정보는 압축된 꼭지점을 풀고, 실좌표를 얻는데 사용되어 진다.
/* Model frame */
struct md2_frame_t
{
  vec3_t scale;               /* scale factor */
  vec3_t translate;           /* translation vector */
  char name[16];              /* frame name */
  struct md2_vertex_t *verts; /* list of frame's vertices */
};
꼭지점 좌표계의 압축을 풀기 위해서, 크기로 각 컴포넌트를 곱하고 각각의 이동 컴포넌트를 더할 필요가 있다:
vec3_t v;                     /* real vertex coords. */
struct md2_vertex_t vtx;      /* compressed vertex */
struct md2_frame_t frame;     /* a model frame */

v[i] = (vtx.v[i] * frame.scale[i]) + frame.translate[i];
OpenGL 명령어는 정수형(int) 배열에 저장된다. 그것은 문서의 말미에 다룰 것이다.
md2_model_t이 모든 당신의 모델 데이타(md2_model_t 객체에 붙어 있는 포인터 *mdl)를 잡고 있는 구조라고 가정하자, 이 코드는 MD2 모델 파일을 어떻게 읽어 오는지를 보여준다:
int
ReadMD2Model (const char *filename, struct md2_model_t *mdl)
{
  FILE *fp;
  int i;

  fp = fopen (filename, "rb");
  if (!fp)
    {
      fprintf (stderr, "Error: couldn't open \"%s\"!\n", filename);
      return 0;
    }

  /* Read header */
  fread (&mdl->header, 1, sizeof (struct md2_header_t), fp);

  if ((mdl->header.ident != 844121161) ||
      (mdl->header.version != 8))
    {
      /* Error! */
      fprintf (stderr, "Error: bad version or identifier\n");
      fclose (fp);
      return 0;
    }

  /* Memory allocations */
  mdl->skins = (struct md2_skin_t *)
    malloc (sizeof (struct md2_skin_t) * mdl->header.num_skins);
  mdl->texcoords = (struct md2_texCoord_t *)
    malloc (sizeof (struct md2_texCoord_t) * mdl->header.num_st);
  mdl->triangles = (struct md2_triangle_t *)
    malloc (sizeof (struct md2_triangle_t) * mdl->header.num_tris);
  mdl->frames = (struct md2_frame_t *)
    malloc (sizeof (struct md2_frame_t) * mdl->header.num_frames);
  mdl->glcmds = (int *)malloc (sizeof (int) * mdl->header.num_glcmds);

  /* Read model data */
  fseek (fp, mdl->header.offset_skins, SEEK_SET);
  fread (mdl->skins, sizeof (struct md2_skin_t),
	 mdl->header.num_skins, fp);

  fseek (fp, mdl->header.offset_st, SEEK_SET);
  fread (mdl->texcoords, sizeof (struct md2_texCoord_t),
	 mdl->header.num_st, fp);

  fseek (fp, mdl->header.offset_tris, SEEK_SET);
  fread (mdl->triangles, sizeof (struct md2_triangle_t),
	 mdl->header.num_tris, fp);

  fseek (fp, mdl->header.offset_glcmds, SEEK_SET);
  fread (mdl->glcmds, sizeof (int), mdl->header.num_glcmds, fp);

  /* Read frames */
  fseek (fp, mdl->header.offset_frames, SEEK_SET);
  for (i = 0; i < mdl->header.num_frames; ++i)
    {
      /* Memory allocation for vertices of this frame */
      mdl->frames[i].verts = (struct md2_vertex_t *)
	malloc (sizeof (struct md2_vertex_t) * mdl->header.num_vertices);

      /* Read frame data */
      fread (mdl->frames[i].scale, sizeof (vec3_t), 1, fp);
      fread (mdl->frames[i].translate, sizeof (vec3_t), 1, fp);
      fread (mdl->frames[i].name, sizeof (char), 16, fp);
      fread (mdl->frames[i].verts, sizeof (struct md2_vertex_t),
	     mdl->header.num_vertices, fp);
    }

  fclose (fp);
  return 1;
}
여기, 모델 mdl의 프레임 n을 어떻게 그릴 것인가 하는 예제가 있다.:
void
RenderFrame (int n, const struct md2_model_t *mdl)
{
  int i, j;
  GLfloat s, t;
  vec3_t v;
  struct md2_frame_t *pframe;
  struct md2_vertex_t *pvert;

  /* n이 가능 영역에 있는지 확인한다. */
  if ((n < 0) || (n > mdl->header.num_frames - 1))
    return;

  /* 모델의 표면입히기(texture)를 가능케 한다. */
  glBindTexture (GL_TEXTURE_2D, mdl->tex_id);

  /* 모델을 그린다. */
  glBegin (GL_TRIANGLES);
    /* 각 삼각형(triangle)을 그린다. */
    for (i = 0; i < mdl->header.num_tris; ++i)
      {
	/* 각 꼭지점을 그린다. */
	for (j = 0; j < 3; ++j)
	  {
	    pframe = &mdl->frames[n];
	    pvert = &pframe->verts[mdl->triangles[i].vertex[j]];

	    /* 표면입히기(texture) 좌표계를 계산한다. */
	    s = (GLfloat)mdl->texcoords[mdl->triangles[i].st[j]].s / mdl->header.skinwidth;
	    t = (GLfloat)mdl->texcoords[mdl->triangles[i].st[j]].t / mdl->header.skinheight;

	    /* OpenGL에 표면입히기(texture)좌표계를 통과시킨다. */
	    glTexCoord2f (s, t);

	    /* Normal vector */
	    glNormal3fv (anorms_table[pvert->normalIndex]);

	    /* 꼭지점의 실좌표를 계산한다. */
	    v[0] = (pframe->scale[0] * pvert->v[0]) + pframe->translate[0];
	    v[1] = (pframe->scale[1] * pvert->v[1]) + pframe->translate[1];
	    v[2] = (pframe->scale[2] * pvert->v[2]) + pframe->translate[2];

	    glVertex3fv (v);
	  }
      }
  glEnd ();
}
MD2 모델은 프레임에서 프레임으로 연사되어 애니메이션화 된다. 한 프레임은 한 애니메이션의 스크린샷이다. 덜덜거리고 추한 애니메이션을 회피하려면, 두개의 연속된 프레임의 꼭지점 좌표 사이에 선형 보간법(linear interplocation)을 사용한다(우리가 그리는 현재 프레임은 다음에 그리는 프레임이다). 표준 벡터를 위해 같은 것을 한다:
struct md2_frame_t *pframe1, *pframe2;
struct md2_vertex_t *pvert1, *pvert2;
vec3_t v_curr, v_next, v;

for (/* ... */)
  {
    pframe1 = &mdl->frames[current];
    pframe2 = &mdl->frames[current + 1];
    pvert1 = &pframe1->verts[mdl->triangles[i].vertex[j]];
    pvert2 = &pframe2->verts[mdl->triangles[i].vertex[j]];

    /* ... */

    v_curr[0] = (pframe1->scale[0] * pvert1->v[0]) + pframe1->translate[0];
    v_curr[1] = (pframe1->scale[1] * pvert1->v[1]) + pframe1->translate[1];
    v_curr[2] = (pframe1->scale[2] * pvert1->v[2]) + pframe1->translate[2];

    v_next[0] = (pframe2->scale[0] * pvert2->v[0]) + pframe2->translate[0];
    v_next[1] = (pframe2->scale[1] * pvert2->v[1]) + pframe2->translate[1];
    v_next[2] = (pframe2->scale[2] * pvert2->v[2]) + pframe2->translate[2];

    v[0] = v_curr[0] + interp * (v_next[0] - v_curr[0]);
    v[1] = v_curr[1] + interp * (v_next[1] - v_curr[1]);
    v[2] = v_curr[2] + interp * (v_next[2] - v_curr[2]);

    /* ... */
  }
v 는 그리기 위한 마지막 꼭지점이다. interp 는 두 프레임 사이에 통계-보간(interpolation:중간값 삽입) 백분율이다. 그것은 0.0~1.0 구간의 float
이다. 그것이 1.0 과 동일 할 때, 현재의 값은 1씩 증가하고 interp 는 0.0으로 다시 초기화
된다. 표면입히기(texture) 좌표계에 삽입할 필요가 없는데 이유는 그것들이 모든 모델 프레임들이 동일 하기 때문이다.
interp가 초당 렌더링되는 프레임의 프로그램의 수(fps)와 관련되어지는 것이 더 바람직하다.
void
Animate (int start, int end, int *frame, float *interp)
{
  if ((*frame < start) || (*frame > end))
    *frame = start;

  if (*interp >= 1.0f)
    {
      /* Move to next frame */
      *interp = 0.0f;
      (*frame)++;

      if (*frame >= end)
	*frame = start;
    }
}
OpenGL 명령어는 단지 GL_TRIANGLE_FAN and GL_TRIANGLE_STRIP primitives를 사용하는 모델을 위한 구조화된 데이타이다. 그것은 꾸러미내에서 읽혀지는 정수(int)형 배열이다:
GL_TRIANGLE_FAN 이다.
우리는 그 데이타들의 꾸러미를 구조화해서 생성할 수 있다:
/* GL 명령 꾸러미들 */
struct md2_glcmd_t
{
  float s;                    /* s texture coord. */
  float t;                    /* t texture coord. */
  int index;                  /* vertex index */
};
여기 렌더링(그리기) 알고리즘을 사용하는 것은 옛날 기능보다 낳은 프레임율을 포함한다. 이유는 우리가 GL_TRIANGLES primitieves를 사용않고 GL_TRIANGLE_FAN 과 GL_TRIANGLE_STRIP
primitives 를 사용하고(어떤 것은 GPU 시간보다 덜 사용한다) 표면입히기(texture) 좌표계는 더이상
계산되지 않개 때문이다(skinwidth와 skinheight로 나눌 필요가 없다). 여기에 그것들을 사용하는 예제가 있다:
void
RenderFrameWithGLCmds (int n, const struct md2_model_t *mdl)
{
  int i, *pglcmds;
  vec3_t v;
  struct md2_frame_t *pframe;
  struct md2_vertex_t *pvert;
  struct md2_glcmd_t *packet;

  /* n이 가능 영역에 있는지 확인한다. */
  if ((n < 0) || (n > mdl->header.num_frames - 1))
    return;

  /* 모델의 표면입히기(texture)를 가능케 한다. */
  glBindTexture (GL_TEXTURE_2D, mdl->tex_id);

  /* 명령 리스트의 시적점 pglcmds 좌표들 */
  pglcmds = mdl->glcmds;

  /* 모델을 그린다. */
  while ((i = *(pglcmds++)) != 0)
    {
      if (i < 0)
	{
	  glBegin (GL_TRIANGLE_FAN);
	  i = -i;
	}
      else
	{
	  glBegin (GL_TRIANGLE_STRIP);
	}

      /*  이 그룹의 각 꼭지점을 그린다. */
      for (/* Nothing */; i > 0; --i, pglcmds += 3)
	{
	  packet = (struct md2_glcmd_t *)pglcmds;
	  pframe = &mdl->frames[n];
	  pvert = &pframe->verts[packet->index];

	  /* OpenGL의 표면입히기(texture) 좌표계를 통과 시킨다. */
	  glTexCoord2f (packet->s, packet->t);

	  /* Normal vector */
	  glNormal3fv (anorms_table[pvert->normalIndex]);

	  /* 꼭지점의 실좌표를 계산한다.( Calculate vertex real position ) */
	  v[0] = (pframe->scale[0] * pvert->v[0]) + pframe->translate[0];
	  v[1] = (pframe->scale[1] * pvert->v[1]) + pframe->translate[1];
	  v[2] = (pframe->scale[2] * pvert->v[2]) + pframe->translate[2];

	  glVertex3fv (v);
	}

      glEnd ();
    }
}
여기 최대 치수들을 정의하는 상수값이 있다:
Sample code: md2.c (16 KB), anorms.h (6.7 KB). No texture mapping.
This document is available under the terms of the GNU Free Documentation License (GFDL)
© David Henry – contact : tfc_duke (AT) club-internet (DOT) fr
Written by David Henry, 19th December of 2004
MD2 model file format 은 id 소프트웨어가 Quake2를 1997년 11월에 출품하면서 소개 되었다. 그것은 이해하기에 정말 쉬운 파일 포멧이다. MD2 모델의 케릭터는 :
모델의 직조물(texture)은 분리된 파일로 존재한다. 한개의 MD2 모델은 동시에 단 하나의 직조물(texture)을 갖는다.
MD2 모델 파일의 확장자는 “md2”이다. MD2 파일은 이진파일의 두 부분으로 나뉜다; header, data. 헤더(머리)는 데이타를 조작하고 사용하기에 필요한 모든 정보를 포함한다.
변수 유형과 크기:
위 자료형은 C언어의 x86 구조와 일치한다. 다른 곳에서 컴파일 할 때 자료형의 크기에 신경을 써야 한다. OS 및 언어별 또는 버젼에 따라서 지원되는 자료형의 크기가 다르기 때문이다.
MD2파일이 이진 포멧이어서, 반드시 엔디안(endianess)을 다뤄야만 한다. MD2 파일은 리틀-엔디안(x86)로 저장된다. 만약 빅-엔디안 구조물(PowerPC, SPARC, ...)을 타켓으로 한다거나, 또는 간단하게 이식성있는 프로그램을 만들고 싶다면, 파일을 읽을 때 각 단어 또는 더블(2배)-단어에 대해서 적절한 전환을 수행해야만 한다.
헤더는 파일의 시작점에 있는 구조이다.:
/* MD2 header */
struct md2_header_t
{
  int ident;                  /* magic number: "IDP2" */
  int version;                /* version: must be 8 */

  int skinwidth;              /* texture width */
  int skinheight;             /* texture height */

  int framesize;              /* size in bytes of a frame */

  int num_skins;              /* number of skins */
  int num_vertices;           /* number of vertices per frame(프레임별 꼭지점들)*/
  int num_st;                 /* number of 모직물(texture) coordinates */
  int num_tris;               /* number of 삼격형(triangles) */
  int num_glcmds;             /* number of opengl commands */
  int num_frames;             /* number of frames(만화 동작들) */

  int offset_skins;           /* offset skin data */
  int offset_st;              /* offset texture coordinate data */
  int offset_tris;            /* offset triangle data */
  int offset_frames;          /* offset frame data */
  int offset_glcmds;          /* offset OpenGL command data */
  int offset_end;             /* offset end of file */
};
ident(식별)은 파일의 마법의 숫자이다. 파일 유형을 식별하는데 사용한다. ident(식별)은 반드시 844121161 과 동일하거나 또는 문자열 “IDP2”와 동일해야 한다. 우리는 (('2'<<24) + ('P'<<16) + ('D'<<8) + 'I') 표현식을 사용하면 얻을 수 있다.
버젼은 파일 포멧 버젼 숫자이며 틀림없이 8이어야 한다..
skinwidth 와 skinheight는 각 모델의 질조물(texture) 넓이와 높이이다.
framesize는 프레임과 그 모든 데이타의 바이트(bytes) 크기이다.
num_skins is the number of associated textures to the model.num_vertices is the number of vertices for one frame.num_st is the number of texture coordinates.num_tris is the number of triangles.num_glcmds is the number of OpenGL commands.num_frames is the number of frame the model has.
offset_skins indicates the position in bytes from the beginning of the file to the texture data.offset_st indicates the position of texture coordinate data.offset_tris indicates the position of triangle data.offset_frames indicates the position of frame data.offset_glcmds indicates the position of OpenGL commands.offset_end indicates the position of the end of the file.
The vector, composed of three floating coordinates (x, y, z):
/* Vector */
typedef float vec3_t[3];
Texture informations are the list of texture names associated to the model:
/* Texture name */
struct md2_skin_t
{
  char name[64];              /* texture file name */
};
Texture coordinates are stored in a structure as short integers. To get the true texture coordinates, you have to divide s by skinwidth and t by skinheight:
/* Texture coords */
struct md2_texCoord_t
{
  short s;
  short t;
};
Each triangle has an array of vertex indices and an array of texture coordinate indices.
/* Triangle info */
struct md2_triangle_t
{
  unsigned short vertex[3];   /* vertex indices of the triangle */
  unsigned short st[3];       /* tex. coord. indices */
};
Vertices are composed of “compressed” 3D coordinates, which are stored in one byte for each coordinate, and of a normal vector index. The normal vector array is stored in the anorms.h file of Quake 2 and hold 162 vectors in floating point (3 float).
/* Compressed vertex */
struct md2_vertex_t
{
  unsigned char v[3];         /* position */
  unsigned char normalIndex;  /* normal vector index */
};
Frames have specific informations for itself and the vertex list of the frame. Informations are used to uncompress vertices and obtain the real coordinates.
/* Model frame */
struct md2_frame_t
{
  vec3_t scale;               /* scale factor */
  vec3_t translate;           /* translation vector */
  char name[16];              /* frame name */
  struct md2_vertex_t *verts; /* list of frame's vertices */
};
To uncompress vertex coordinates, you need to multiply each component by the scale factor and then add the respective translation component:
vec3_t v;                     /* real vertex coords. */
struct md2_vertex_t vtx;      /* compressed vertex */
struct md2_frame_t frame;     /* a model frame */

v[i] = (vtx.v[i] * frame.scale[i]) + frame.translate[i];
OpenGL commands are stored in an array of integer (int). They are discussed at the end of this document.
Assuming that md2_model_t is a structure holding all your model's data and *mdl a pointer on a md2_model_t object, this code show how to load a MD2 model file:
int
ReadMD2Model (const char *filename, struct md2_model_t *mdl)
{
  FILE *fp;
  int i;

  fp = fopen (filename, "rb");
  if (!fp)
    {
      fprintf (stderr, "Error: couldn't open \"%s\"!\n", filename);
      return 0;
    }

  /* Read header */
  fread (&mdl->header, 1, sizeof (struct md2_header_t), fp);

  if ((mdl->header.ident != 844121161) ||
      (mdl->header.version != 8))
    {
      /* Error! */
      fprintf (stderr, "Error: bad version or identifier\n");
      fclose (fp);
      return 0;
    }

  /* Memory allocations */
  mdl->skins = (struct md2_skin_t *)
    malloc (sizeof (struct md2_skin_t) * mdl->header.num_skins);
  mdl->texcoords = (struct md2_texCoord_t *)
    malloc (sizeof (struct md2_texCoord_t) * mdl->header.num_st);
  mdl->triangles = (struct md2_triangle_t *)
    malloc (sizeof (struct md2_triangle_t) * mdl->header.num_tris);
  mdl->frames = (struct md2_frame_t *)
    malloc (sizeof (struct md2_frame_t) * mdl->header.num_frames);
  mdl->glcmds = (int *)malloc (sizeof (int) * mdl->header.num_glcmds);

  /* Read model data */
  fseek (fp, mdl->header.offset_skins, SEEK_SET);
  fread (mdl->skins, sizeof (struct md2_skin_t),
	 mdl->header.num_skins, fp);

  fseek (fp, mdl->header.offset_st, SEEK_SET);
  fread (mdl->texcoords, sizeof (struct md2_texCoord_t),
	 mdl->header.num_st, fp);

  fseek (fp, mdl->header.offset_tris, SEEK_SET);
  fread (mdl->triangles, sizeof (struct md2_triangle_t),
	 mdl->header.num_tris, fp);

  fseek (fp, mdl->header.offset_glcmds, SEEK_SET);
  fread (mdl->glcmds, sizeof (int), mdl->header.num_glcmds, fp);

  /* Read frames */
  fseek (fp, mdl->header.offset_frames, SEEK_SET);
  for (i = 0; i < mdl->header.num_frames; ++i)
    {
      /* Memory allocation for vertices of this frame */
      mdl->frames[i].verts = (struct md2_vertex_t *)
	malloc (sizeof (struct md2_vertex_t) * mdl->header.num_vertices);

      /* Read frame data */
      fread (mdl->frames[i].scale, sizeof (vec3_t), 1, fp);
      fread (mdl->frames[i].translate, sizeof (vec3_t), 1, fp);
      fread (mdl->frames[i].name, sizeof (char), 16, fp);
      fread (mdl->frames[i].verts, sizeof (struct md2_vertex_t),
	     mdl->header.num_vertices, fp);
    }

  fclose (fp);
  return 1;
}
여기, 모델 mdl의 프레임 n을 어떻게 그릴 것인가 하는 예제가 있다.:
void
RenderFrame (int n, const struct md2_model_t *mdl)
{
  int i, j;
  GLfloat s, t;
  vec3_t v;
  struct md2_frame_t *pframe;
  struct md2_vertex_t *pvert;

  /* n이 가능 영역에 있는지 확인한다. */
  if ((n < 0) || (n > mdl->header.num_frames - 1))
    return;

  /* 모델의 직조물(texture)을 가능케 한다. */
  glBindTexture (GL_TEXTURE_2D, mdl->tex_id);

  /* 모델을 그린다. */
  glBegin (GL_TRIANGLES);
    /* 각 삼각형(triangle)을 그린다. */
    for (i = 0; i < mdl->header.num_tris; ++i)
      {
	/* 각 꼭지점을 그린다. */
	for (j = 0; j < 3; ++j)
	  {
	    pframe = &mdl->frames[n];
	    pvert = &pframe->verts[mdl->triangles[i].vertex[j]];

	    /* 직조물(texture) 좌표계를 계산한다. */
	    s = (GLfloat)mdl->texcoords[mdl->triangles[i].st[j]].s / mdl->header.skinwidth;
	    t = (GLfloat)mdl->texcoords[mdl->triangles[i].st[j]].t / mdl->header.skinheight;

	    /* OpenGL에 직조물(texture)좌표계를 통과시킨다. */
	    glTexCoord2f (s, t);

	    /* Normal vector */
	    glNormal3fv (anorms_table[pvert->normalIndex]);

	    /* 꼭지점의 실좌표를 계산한다. */
	    v[0] = (pframe->scale[0] * pvert->v[0]) + pframe->translate[0];
	    v[1] = (pframe->scale[1] * pvert->v[1]) + pframe->translate[1];
	    v[2] = (pframe->scale[2] * pvert->v[2]) + pframe->translate[2];

	    glVertex3fv (v);
	  }
      }
  glEnd ();
}
MD2 models are frame-by-frame animated. A frame is a screenshot of an animation. To avoid jerky and ugly animations, we use linear interpolation between vertex coordinates of two consecutive frames (the current frame we are drawing and the next frame). We do the same for the normal vector:
struct md2_frame_t *pframe1, *pframe2;
struct md2_vertex_t *pvert1, *pvert2;
vec3_t v_curr, v_next, v;

for (/* ... */)
  {
    pframe1 = &mdl->frames[current];
    pframe2 = &mdl->frames[current + 1];
    pvert1 = &pframe1->verts[mdl->triangles[i].vertex[j]];
    pvert2 = &pframe2->verts[mdl->triangles[i].vertex[j]];

    /* ... */

    v_curr[0] = (pframe1->scale[0] * pvert1->v[0]) + pframe1->translate[0];
    v_curr[1] = (pframe1->scale[1] * pvert1->v[1]) + pframe1->translate[1];
    v_curr[2] = (pframe1->scale[2] * pvert1->v[2]) + pframe1->translate[2];

    v_next[0] = (pframe2->scale[0] * pvert2->v[0]) + pframe2->translate[0];
    v_next[1] = (pframe2->scale[1] * pvert2->v[1]) + pframe2->translate[1];
    v_next[2] = (pframe2->scale[2] * pvert2->v[2]) + pframe2->translate[2];

    v[0] = v_curr[0] + interp * (v_next[0] - v_curr[0]);
    v[1] = v_curr[1] + interp * (v_next[1] - v_curr[1]);
    v[2] = v_curr[2] + interp * (v_next[2] - v_curr[2]);

    /* ... */
  }
v is the final vertex to draw. interp is the interpolation percent between the two frames. It's a float which ranges from 0.0 to 1.0. When it is equal to 1.0, current is incremented by 1 and interp
is reinitialized at 0.0. It is useless to interpolate texture
coordinates because they are the same for all the model frames. It is
preferable that interp is related to the program's number of rendering frame per second (fps).
void
Animate (int start, int end, int *frame, float *interp)
{
  if ((*frame < start) || (*frame > end))
    *frame = start;

  if (*interp >= 1.0f)
    {
      /* Move to next frame */
      *interp = 0.0f;
      (*frame)++;

      if (*frame >= end)
	*frame = start;
    }
}
OpenGL commands are structured data for drawing the model using only GL_TRIANGLE_FAN and GL_TRIANGLE_STRIP primitives. It's an array of integers (int) which can be read in packets:
GL_TRIANGLE_STRIP, otherwise it's a GL_TRIANGLE_FAN.
우리는 그 데이타들의 꾸러미를 구조화해서 생성할 수 있다:
/* GL 명령 꾸러미들 */
struct md2_glcmd_t
{
  float s;                    /* s texture coord. */
  float t;                    /* t texture coord. */
  int index;                  /* vertex index */
};
Using this rendering algorithm implies a better frame rate than the classical method because we don't use GL_TRIANGLES primitives but GL_TRIANGLE_FAN and GL_TRIANGLE_STRIP
primitives (which use less GPU time) and texture coordinates are no
longer calculated (no need do divide by skinwidth and skinheight). Here
is an exemple of how to use them:
void
RenderFrameWithGLCmds (int n, const struct md2_model_t *mdl)
{
  int i, *pglcmds;
  vec3_t v;
  struct md2_frame_t *pframe;
  struct md2_vertex_t *pvert;
  struct md2_glcmd_t *packet;

  /* n이 가능 영역에 있는지 확인한다. */
  if ((n < 0) || (n > mdl->header.num_frames - 1))
    return;

  /* 모델의 직조물(texture)을 가능케 한다. */
  glBindTexture (GL_TEXTURE_2D, mdl->tex_id);

  /* 명령 리스트의 시적점 pglcmds 좌표들 */
  pglcmds = mdl->glcmds;

  /* 모델을 그린다. */
  while ((i = *(pglcmds++)) != 0)
    {
      if (i < 0)
	{
	  glBegin (GL_TRIANGLE_FAN);
	  i = -i;
	}
      else
	{
	  glBegin (GL_TRIANGLE_STRIP);
	}

      /*  이 그룹의 각 꼭지점을 그린다. */
      for (/* Nothing */; i > 0; --i, pglcmds += 3)
	{
	  packet = (struct md2_glcmd_t *)pglcmds;
	  pframe = &mdl->frames[n];
	  pvert = &pframe->verts[packet->index];

	  /* OpenGL의 직조물(texture) 좌표계를 통과 시킨다. */
	  glTexCoord2f (packet->s, packet->t);

	  /* Normal vector */
	  glNormal3fv (anorms_table[pvert->normalIndex]);

	  /* 꼭지점의 실좌표를 계산한다.( Calculate vertex real position ) */
	  v[0] = (pframe->scale[0] * pvert->v[0]) + pframe->translate[0];
	  v[1] = (pframe->scale[1] * pvert->v[1]) + pframe->translate[1];
	  v[2] = (pframe->scale[2] * pvert->v[2]) + pframe->translate[2];

	  glVertex3fv (v);
	}

      glEnd ();
    }
}
여기 최대 치수들을 정의하는 상수값이 있다:
Sample code: md2.c (16 KB), anorms.h (6.7 KB). No texture mapping.
This document is available under the terms of the GNU Free Documentation License (GFDL)
© David Henry – contact : tfc_duke (AT) club-internet (DOT) fr
make
make install
make clean
깔끔하다. -_-;;


LIBS += -Lbin

INCLUDEPATH += .

QMAKE_LIBDIR = bin

QMAKE_CXXFLAGS_DEBUG += -DQTTEST_DEBUG

DEFINES = MYFLAGS

TARGET = qttest

DESTDIR = bin

CONFIG += debug \

          warn_on \

          qt \

          opengl \

          thread \

          rtti

TEMPLATE = app

SOURCES += helloworld.cpp

DEPENDPATH +=
#include

#include


int main(int argc, char *argv[])

{

    QApplication app(argc, argv);


    QPushButton hello("Hello world!");

    hello.resize(100, 30);


    hello.show();

    return app.exec();

}


|
| 일 | 월 | 화 | 수 | 목 | 금 | 토 |
|---|---|---|---|---|---|---|
| 1 | 2 | 3 | 4 | |||
| 5 | 6 | 7 | 8 | 9 | 10 | 11 |
| 12 | 13 | 14 | 15 | 16 | 17 | 18 |
| 19 | 20 | 21 | 22 | 23 | 24 | 25 |
| 26 | 27 | 28 | 29 | 30 | 31 |

